Click the Admin tab.
In the side panel, select Grouping.
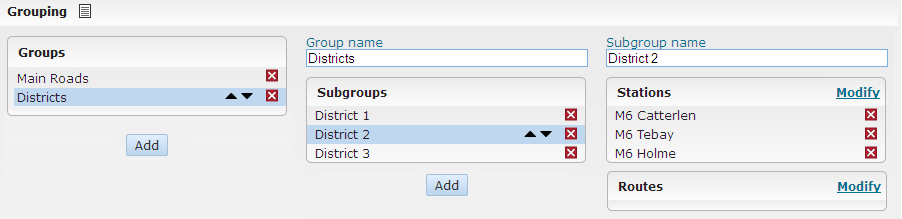
Click the Add button. A new group with no name is created. To give the new group a name, click in the Group name field on the right, type the name in the field, and press ENTER. The new name will appear in the Groups list.
Create the subgroups by clicking the Add button. A new subgroup with no name is created. To give the new subgroup a name, click in the Subgroup name field, type the name in the field, and press ENTER. The new name will appear in the Subgroups list.
Add stations or routes to a subgroup by clicking one of the Modify buttons. A window with list of the available stations or routes is displayed. Select the stations or routes and click the Close button.
The selected station(s) will appear in the Stations list.
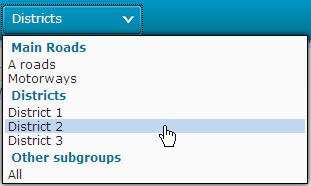
Create other groups and subgroups in the
same way. In the following example, two subgroups have been created:
"Districts" and "Main Roads". The Stations
frame displays the stations added to subgroup "District2".
Click the Save button to save the created grouping.